The LED on the ESP32 lighting up does not mean the cable can tramsit data. All cables will be wired for power, thus the LED will always turn on, even with a bad cable
##### Install the required Arduino librariesThe library versions are susceptible to change if you read this page late after it was last updated
| **SSR1 - OSR2 - SR6** | |
| This library offers support for the ESP32 to the Arduino IDE, and is mandatory if you use an ESP32. Via the taskbar on the left, click on the Boards Manager. Search for "ESP32", and install the `esp32` library by *Espressif Systems* | [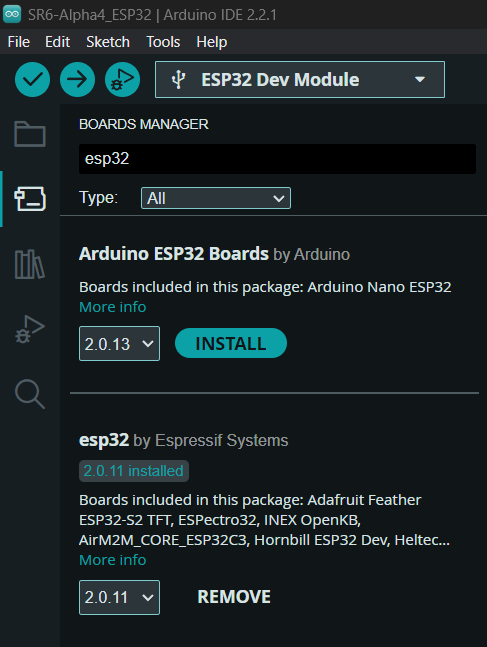](https://osr.wiki/uploads/images/gallery/2023-12/image.png) |
| **SSR1 only** | |
| OSR2 and SR6 both use servomotors, but the SSR1 uses a BLDC (***B**rush**L**ess **D**irect **C**urrent*) motor, driven by an FOC controller, and we need two libraries to control it using the ESP32.
In the Library Manager tab, under the Boards Manager, search for "SimpleFOC". Install **both** the `Simple FOC` and `SimpleFOCDrivers` libraries, by *Simplefoc.*
As of January 1st 2024, you **must** use specific versions of said libraries: Simple FOC **2.3.0** SimpleFOCDrivers **1.0.4** Once installed, **do not update** them [](https://osr.wiki/uploads/images/gallery/2023-12/K4Jimage.png) | [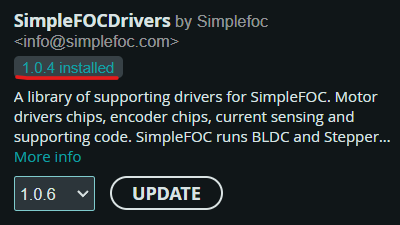](https://osr.wiki/uploads/images/gallery/2023-12/EPoimage.png)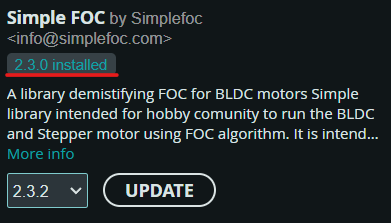 |
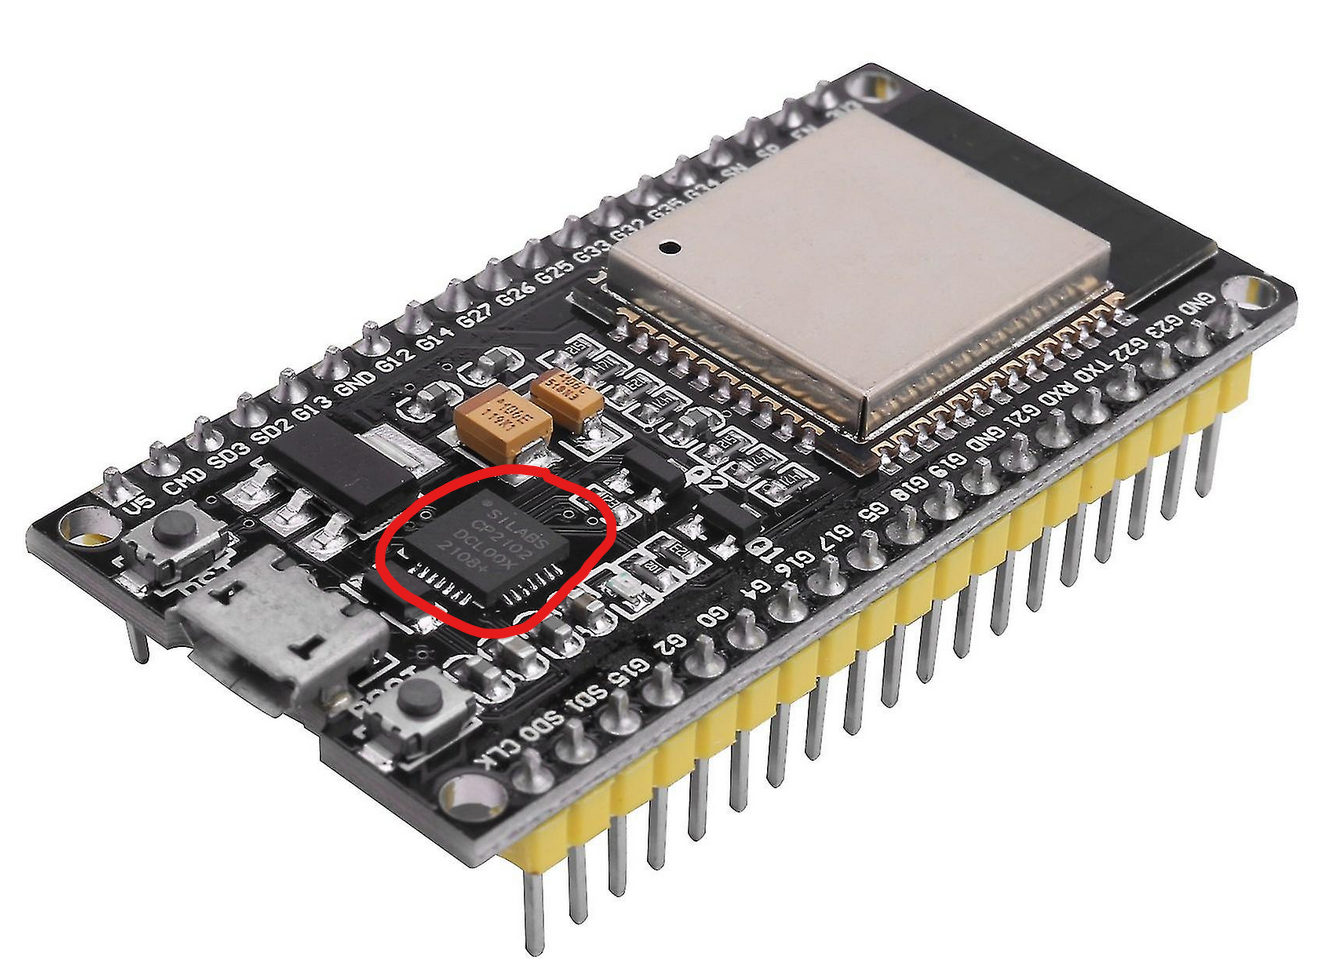
ESP32 boards should possess a `cp2102` UART to USB chip, which handles talking to the computer over the USB cable. However, Espressif also lists FTDI as a possible manufacturer.
Check the chip circled in red on your own board, and make sure it has "SILABS" written on it before downloading and installing the Silicon Labs drivers.
[](https://osr.wiki/uploads/images/gallery/2023-12/GnVimage.png)To install the Silicon Labs drivers, right click the `silabser.inf` file and select *Install*
### Flashing the firmware 1. Plug in your ESP32 to your computer. With the Arduino IDE opened, select your board and COM port via the *Select Board* dropdown menu [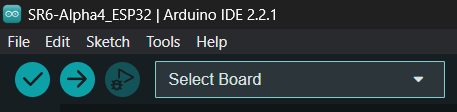](https://osr.wiki/uploads/images/gallery/2023-12/Foiimage.png)If you have installed the `esp32`library correctly, the board should show up under the name `DOIT ESP32 DEVKIT V1`. Select it. The COM port number will vary, it might not be COM5, but COM3 or COM9 for example. [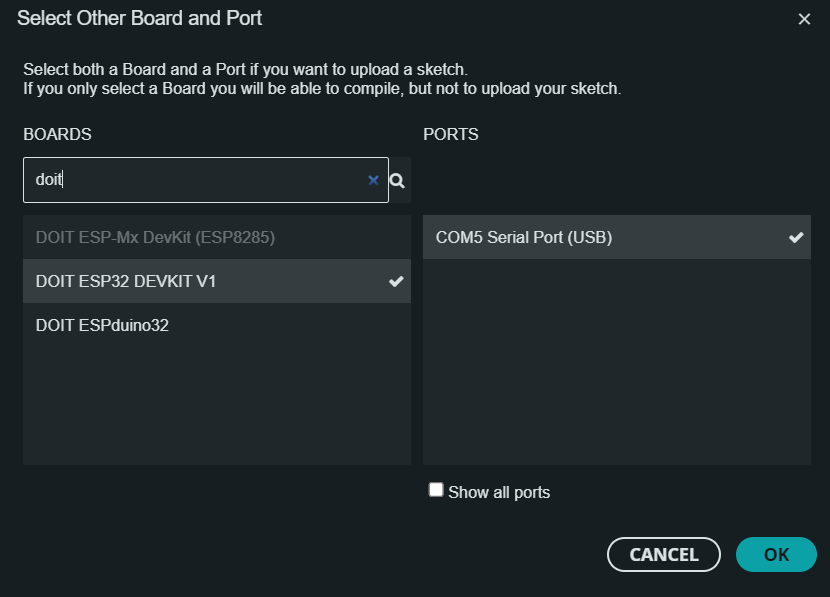](https://osr.wiki/uploads/images/gallery/2023-12/dQqimage.png) 2. Click on the `Upload` button (the right-pointing arrow) once everything is in order [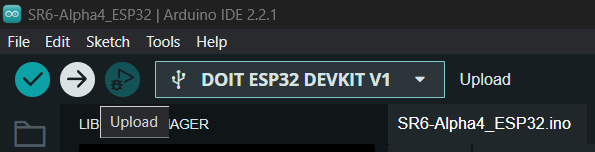](https://osr.wiki/uploads/images/gallery/2023-12/OD7image.png) 3. When the console shows a line saying "*Connecting...*" you *may* need to **press and hold** the `boot` button on your ESP32, until other lines show up, at which point you can release the button (not all boards require this). Otherwise, it won't be able to be flashed, and you'll get an error [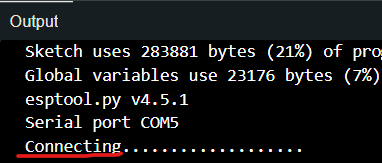](https://osr.wiki/uploads/images/gallery/2023-12/kNgimage.png) 4. The end of the console output should look like this after the fact **[](https://osr.wiki/uploads/images/gallery/2023-12/RiAimage.png)****Congratulations!** You have successfully flashed your ESP32 microcontroller with your stroker's firmware. Next step: testing that all the axes move the right way.